
So, my last post mainly covered design and set-up, not very programmer-like if I do say so (heh). Well worry not oh reader, this blog post will be doing more of that. … … … I’m kidding. Well, sort of. There will be more design happening, but there will also be scripting happening so, happy days.
Well then, first things first, in my last blog post I promised to show how I set up those crazy dropdown things. It’s pretty simple to do, but it’s definitely one of the more powerful features of Google Sheets (that I’ve found at least). Basically all you need to do is select the data that you want ‘categorised’, right click and select “Define Named Range”.

This option is pretty self-explanatory, it will let you create specific ranges of data to use anywhere in your spreadsheet, neat! After creating your named range, you just need to select the cell you want the dropdown in, right-click it and select Data Validation. This should make a popup appear, asking for more details.
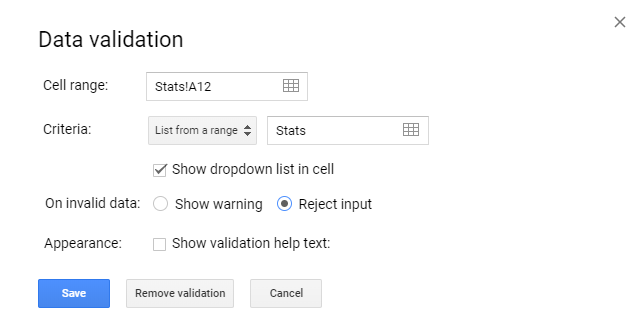
In the Criteria segment, type the name of that data range you just created, press Save and viola, you now have drop down input.
Ok, with that out of the way, I need to talk design. One of the things I want to be able to do with my sheet is easily create new classes. My solution to that is to create a ‘base’ class that can be duplicated when needed. Enter Bases:
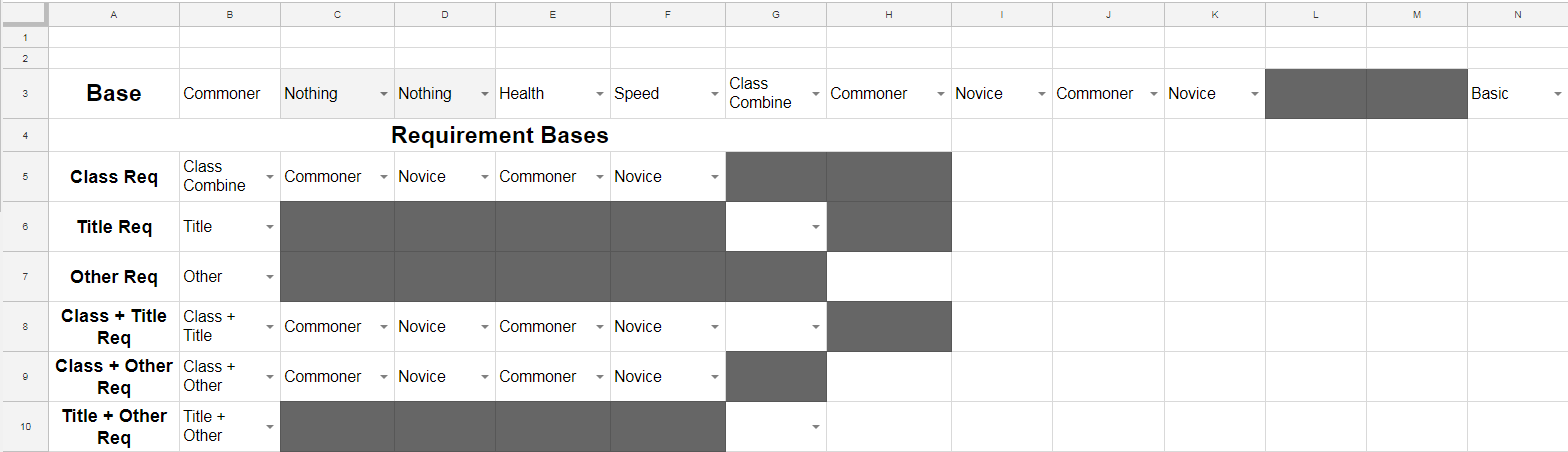
The top one there is pretty obvious, it’s just a duplicate of the class I showed in my previous post. The bottom six are a bit more complicated, they are actually all of the possible selections for the Requirement portion of the classes. My plan is to switch between these bases when the user changes their selection in the classes sheet.
Alrighty. Design is done, time to actually get into the scripting side of this whole project. Just as a preface, to get into the google script editor, select Tools – Script Editor in your spreadsheet. I’ll now throw some code around, it’s all commented so hopefully I don’t need to explain anything outside of it.
 Side Note: If anyone knows a nice way to copy code into WordPress, please let me know.
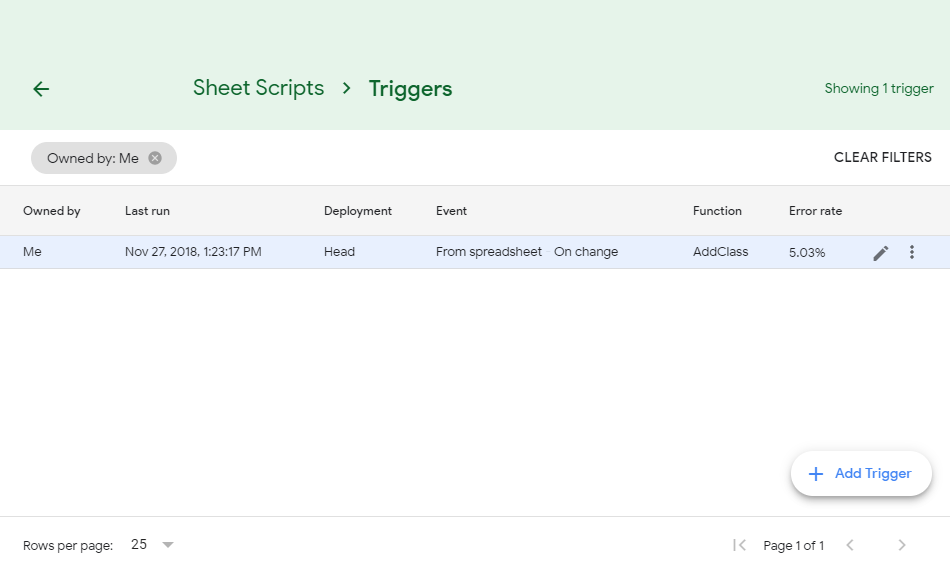
So that’s the code portion of the adding classes function, but one issue remains. How exactly is this code supposed to be triggered? If you read the comments in my code, you’ll know that I have a variable for a Toggle in the Class sheet. That is how I plan to trigger the code, but first we need to be able to monitor that Toggle. The way to do that is through Project Triggers.
To access Triggers, go to Edit – Current Project Triggers. From this page you can create new triggers for your code to hook into. For my AddClass function, I created a trigger that runs the code whenever the Classes sheet is edited. This may sound bad, but this is the reason I have checks in the function for the Toggle’s status. The function gets called whenever a change is detected, but it the Toggle is false, nothing will actually happen.
So, with that all set up, we can now see how the sheet acts when adding new classes.
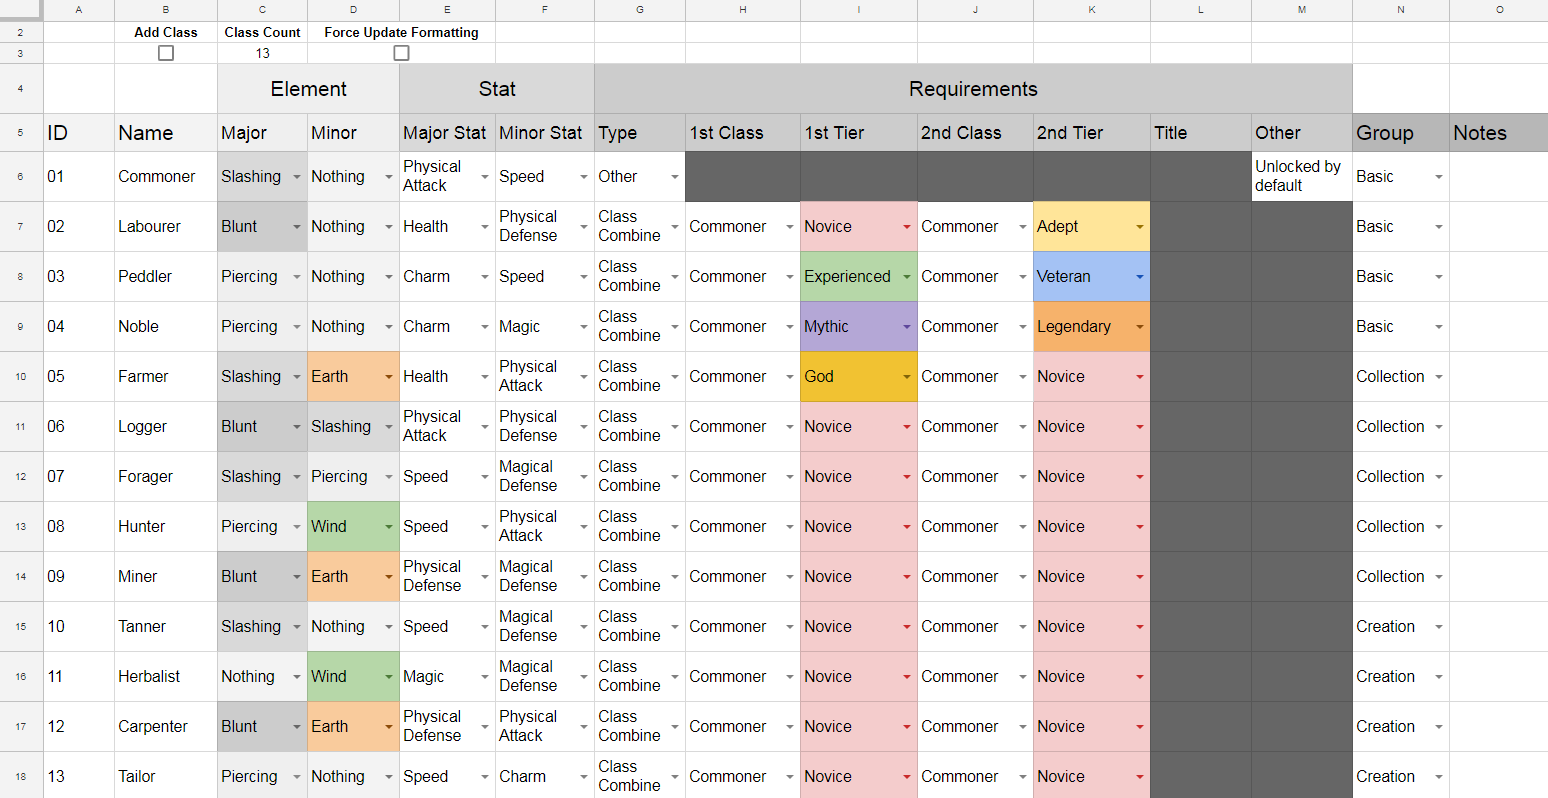
As you can see, the top row now has our Add Class toggle as well as a counter for the overall amount of classes. You can see that I’ve added IDs to the classes since the last blog post, this was done for sorting purposes later down the line. I added those 12 extra classes in about a minute, showing just how powerful the script is.
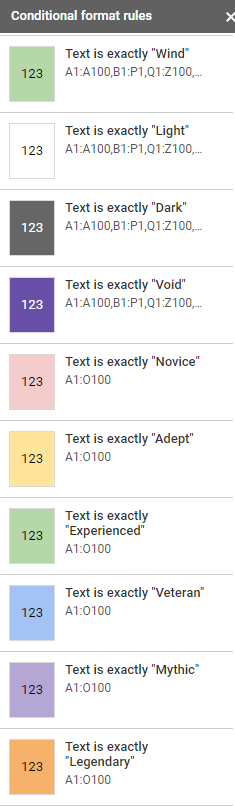
The last thing I want to go over in this post is Conditional Formatting. You’ve probably noticed the different colors populating the class list, Conditional Formatting is the culprit for that. I’ve set up some rules to change various colors around the sheet based on the value of each cell. By right clicking a selection, you can select Conditional Formatting to set up your own rules.
That about wraps it up for this post, we got some programming done today! Woop woop. The next post will cover implementation for the other bases I set up earlier in this post, as well as some set up for the skills mechanic. ‘Till next time.
– Liam